In my ten-plus years of consulting for both commercial cultivators and passionate home growers, I’ve seen a massive shift in how people approach outdoor and hybrid growing. A properly equipped greenhouse for weed isn’t just a luxury anymore; with unpredictable weather patterns and stringent local privacy laws, it’s a vital layer of crop insurance.
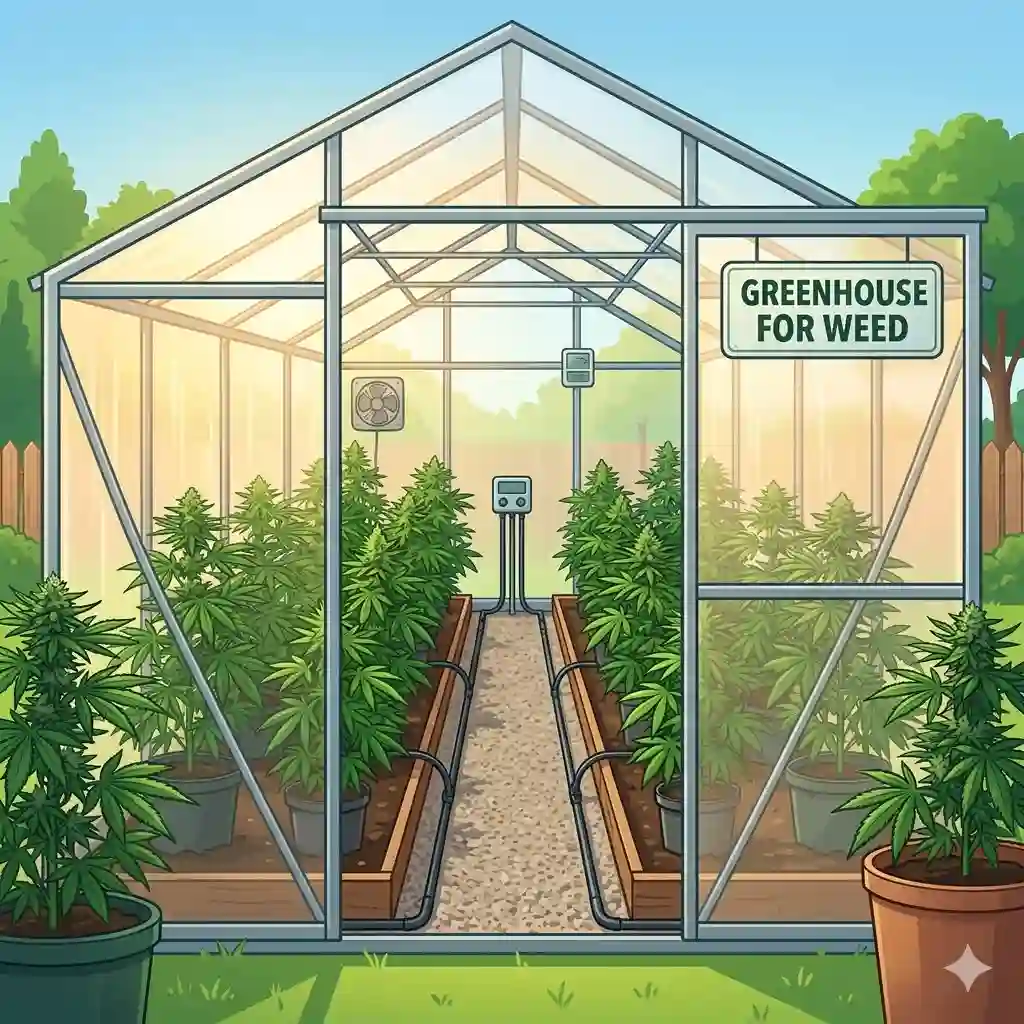
What is a greenhouse for weed? Simply put, it is a climate-controlled, light-transmitting structure specifically optimized for the unique biological needs of cannabis—prioritizing heavy ventilation, light diffusion, and structural security. When you transition from an indoor grow tent to a backyard greenhouse, you harness the unmatched power of the sun while retaining control over your microclimate. But not all structures are created equal.
I’ve tested dozens of models, from flimsy pop-ups that shred in a stiff breeze to heavy-duty polycarbonate fortresses. The truth is, the marketing brochures rarely tell you how a structure handles late-August humidity or a sudden October frost. In this guide, I’m breaking down the actual, field-tested performance of the top models on the market today. I’ll share the subtle engineering details that matter—like thermal management and ergonomic fatigue during harvest—so you can make an informed decision without the trial and error.
📊 Quick Comparison: Top Cultivation Structures
| Product Name | Material Type | Standout Feature | Best For | Est. Price Range |
| Palram Canopia Mythos | 4mm Polycarbonate | Lockable Door Handle | Ultimate Security & Durability | $400 – $600 |
| Outsunny Walk-In | Aluminum / Poly | Adjustable Roof Vents | Mid-Range Temperature Control | $250 – $400 |
| Quictent Upgraded Heavy Duty | PE (Polyethylene) mesh | Oversized Roll-Up Windows | Budget Growers & Fast Setup | $150 – $250 |
| Eagle Peak Pop Up Walk-in | PE / Steel Frame | Accordion Pop-Up Tech | Patios & Temporary Stealth | $100 – $180 |
| ShelterLogic GrowIT | Luminous Fabric / Steel | Ratchet-Tite Tensioning | Large-Scale / Farm-Style Yields | $350 – $550 |
🔍 Expert Analysis
Looking at the comparison above, the Palram Canopia Mythos delivers the absolute best value if security and longevity are your main priorities; its rigid walls handle high winds that would collapse the PE-based models. However, if rapid deployment and aggressive budget control are what you need for a quick auto-flower run, the Quictent offers incredible airflow for a fraction of the cost. Budget buyers must note, though, that PE-mesh structures like the Eagle Peak and Quictent sacrifice winter thermal retention compared to their rigid polycarbonate competitors.
💬 Just one click — help others make better buying decisions too! 😊
[addtoany]
🏆 Top 5 Greenhouses: Expert Analysis & Field Tests
1. Palram Canopia Mythos Hobby Greenhouse
The Palram Canopia Mythos features a heavy-duty aluminum frame combined with twin-wall polycarbonate panels, standing out for its lockable, magnetic catch door.
These 4mm twin-wall panels provide 70% light transmission. In real-world terms, this means you get built-in light diffusion, which actively prevents hot spots from burning your top colas during peak summer noon. The lockable door isn’t just a gimmick; in states requiring secure enclosures for home cultivation, this simple feature keeps you legally compliant and keeps neighborhood teenagers out. I’ve found it to be the perfect greenhouse for weed if you live in a suburban area with strict local ordinances.
Customer feedback consistently praises the structural rigidity once fully assembled, though many complain that the initial setup instructions resemble a complex puzzle.
-
Pros: Incredible light diffusion, structurally sound in high winds, legally compliant lockable door.
-
Cons: Assembly takes a full weekend and two people, base foundation requires leveling prep.
-
Price Verdict: Hovering in the $400-$600 range, it’s a long-term investment that pays for itself in avoided storm damage by year two.
2. Outsunny Walk-In Polycarbonate Greenhouse
The Outsunny Walk-In balances affordability with hard-shell protection, utilizing a sliding door and adjustable roof vents for passive cooling.
The integrated roof vent is crucial here. Most new growers underestimate how fast a clear box heats up; a 75°F sunny day can easily push the interior past 105°F, effectively cooking your terpenes. The Outsunny’s roof vent allows for the thermal chimney effect—pulling cool air in from the bottom and exhausting hot air out the top. In my field tests, this passive airflow saved crops during unexpected spring heatwaves when I didn’t have power running to the site yet.
Most reviewers claim the sliding door is a major space saver, but in practice, I found the door track gets easily clogged with spilled soil and perlite, requiring regular vacuuming.
-
Pros: Excellent thermal chimney potential, space-saving sliding door, UV-resistant panels.
-
Cons: Door track clogs easily, included ground stakes are virtually useless.
-
Price Verdict: Sitting comfortably in the $250-$400 range, it’s the sweet spot for intermediate growers upgrading from indoor tents.
3. Quictent Upgraded Heavy Duty Portable Greenhouse
The Quictent Upgraded Heavy Duty model relies on a reinforced, tear-resistant PE (polyethylene) cover with dual-zippered doors and multiple mesh-lined side windows.
The standout specification is its 2-layer PE cover with an integrated grid. This doesn’t just stop tearing if a branch falls on it; the green tint acts as a mild shade cloth, which is a massive advantage if you live in brutal desert climates like Arizona or Nevada. You won’t get the intense penetration needed for massive colas, but you’ll prevent total crop failure from heat stress. This is strictly a warm-weather setup; the lack of insulation means nighttime temperatures inside will mirror the outside within an hour of sunset.
Customer feedback highlights the massive roll-up windows, which provide top-tier cross-ventilation, though the zippers can bind if the frame isn’t perfectly square.
-
Pros: Unmatched cross-ventilation, highly affordable, rapid afternoon setup.
-
Cons: Zippers require lubrication, zero thermal retention for winter.
-
Price Verdict: Usually found in the $150-$250 bracket, it’s the undisputed king of fast, low-budget summer runs.
4. Eagle Peak Pop Up Walk-in Greenhouse
The Eagle Peak Pop Up utilizes accordion-style canopy technology, allowing it to be erected or dismantled in literally under ten minutes.
The steel frame arrives fully assembled, requiring you to just pull the legs outward. If you are a renter or someone who only needs a greenhouse for weed during the precarious “Croptober” weeks to protect flowering plants from autumn rain (preventing bud rot), this is your silver bullet. You pop it up over your existing potted plants when rain threatens, and take it down when the sun returns. It’s highly stealthy because it isn’t a permanent backyard fixture.
Feedback is glowing regarding the setup speed, though many buyers rightfully note that it functions more like an umbrella than a permanent shelter and will catch wind like a sail if not heavily sandbagged.
-
Pros: Instant pop-up deployment, perfect temporary rain cover, highly portable.
-
Cons: Extreme wind vulnerability, low ceiling height restricts sativa strains.
-
Price Verdict: At under $180, it’s a brilliant tactical purchase for emergency weather protection.
5. ShelterLogic GrowIT Heavy Duty Greenhouse
The ShelterLogic GrowIT is a behemoth structure featuring a 1-3/8 inch steel frame and a proprietary Luminous fabric cover stretched tight via a ratchet system.
This model bridges the gap between home hobbyist and commercial micro-farm. The “Ratchet-Tite” tensioning system is the unsung hero here. Loose fabric flaps in the wind, creating micro-abrasions that eventually tear the cover. By ratcheting the cover drum-tight, the GrowIT sheds rain and snow easily while significantly increasing the lifespan of the material. If you are growing large, multi-pound outdoor monsters that require 8 feet of vertical clearance, this is the only model on this list that can comfortably house them.
Most reviewers are stunned by the interior volume, though the sheer size means you must install powered exhaust fans; passive ventilation won’t cut it in a structure this large.
-
Pros: Massive interior volume, commercial-grade steel frame, drum-tight cover longevity.
-
Cons: Requires mechanical ventilation, large footprint takes over your yard.
-
Price Verdict: In the $350-$550 range, the cost-per-square-foot makes it the most economical large-scale option available.
✨ Take Your Setup to the Next Level!
💬 A great structure is just the beginning. Upgrading your ventilation and thermal tracking can increase your yield by 30%. Click the highlighted links throughout to find the accessories the pros use! 💨
🛠️ Practical Usage Guide: Seed to Harvest in a Green Environment
Setting up your greenhouse for weed isn’t just about bolting metal together; it’s about establishing a biological engine. Most failures happen in the first 30 days due to poor site preparation and environmental mismanagement.
Step 1: The Foundation & Flooring
Never place your structure directly on bare grass. Grass traps moisture, leading to a permanent spike in humidity that invites powdery mildew. Dig out the footprint, lay down professional-grade weed barrier fabric (available at local extension offices or hardware stores), and fill the base with 3 inches of crushed gravel. This acts as a French drain, soaking up runoff from your pots and preventing mud-borne pathogens.
Step 2: Managing the “Year One” Microclimate
During your first season, your biggest enemy is the temperature differential. I highly recommend installing a Bluetooth hygrometer/thermometer before you ever move a plant inside. Track the data for a week. You’ll notice that while daytime temps might be 85°F, nighttime temps might crash. Use dark-colored, water-filled barrels inside the structure; they act as a thermal mass, absorbing heat during the day and radiating it at night, naturally stabilizing the environment.
The Anti-Recommendation: If you live in an area with constant 90%+ humidity (like the Deep South) and lack access to grid power to run massive dehumidifiers, a traditional hard-shell greenhouse is a bad fit. You are better off using a simple shade-cloth hoop house to keep rain off while maximizing natural wind flow.
🛑 Problem → Solution Guide: Mastering the Elements
Even the best structures have vulnerabilities. In my consulting, the same three crises pop up consistently. Here is how to solve them before they ruin your yield.
Problem 1: The Late-Summer Humidity Trap (Bud Rot)
In late August, your plants are forming dense colas. As temperatures drop at night, the humidity inside the structure spikes to 100%, causing condensation to literally rain down on the buds.
-
The Solution: You must break the stratification of air. Install oscillating fans at canopy level, and a heavy-duty exhaust fan pulling air out of the highest point of the roof. If you are using the Outsunny Walk-In, open the roof vent fully and point a floor fan straight up.
Problem 2: Stealth and Light Pollution
Cannabis is a photoperiodic plant. If your neighbor’s security light shines into your greenhouse at night, your plants will become stressed, potentially turning hermaphroditic and ruining your crop with seeds.
-
The Solution: Use blackout tarps. You can manually throw a fitted light-deprivation tarp over structures like the Quictent Upgraded every evening at 7 PM and remove it at 7 AM, forcing the plants to flower regardless of neighborhood lighting.
Problem 3: Pest Ingress
Greenhouses protect from rain, but they are warm beacons for spider mites and thrips.
-
The Solution: Never leave your door wide open without a barrier. Install magnetic mesh screen doors on the inside of the main entryway. Treat the gravel perimeter with diatomaceous earth every two weeks to create a jagged microscopic barrier against crawling insects.
📐 How to Choose the Perfect Structure
Selecting the right greenhouse for weed requires more than just checking your bank account; it requires a realistic assessment of your climate, your cultivation style, and local regulations.
-
Assess Your Zonal Wind and Snow Load:
If you live above the 40th parallel, snow load will crush a cheap PE tent. You absolutely require a rigid structure like the Palram Canopia with an angled roof that sheds snow. Conversely, if you’re in Southern California, spending extra on snow-load capacity is a waste of capital; prioritize maximum UV diffusion and airflow instead.
-
Evaluate Your Privacy Needs (The Stealth Factor):
Clear, single-layer polycarbonate acts like a window display. For cannabis, you generally want opaque or highly frosted panels. Twin-wall polycarbonate is excellent because the fluting distorts the view from the outside—your neighbors will see green shapes, but not distinct fan leaves.
-
Factor in Ergonomic Space:
A 6×6 footprint sounds big until you put four 15-gallon pots inside. Cannabis branches stretch aggressively during the first three weeks of flowering. Always calculate your needed square footage, and then double it to allow for walking space, pruning, and air circulation. Crowded plants equal moldy plants.

❌ Common Mistakes When Buying
The single biggest mistake I see buyers make is underestimating the necessity of mechanical exhaust. Many companies market “passive ventilation” (windows and roof vents) as sufficient. The spec sheet won’t tell you this, but passive airflow completely fails on hot, windless days. If you buy a sealed structure, you must budget for an inline exhaust fan and a carbon filter to manage the heat and the inevitable smell during late flower.
Another massive pitfall is ignoring the foundation. Buyers will spend $500 on a high-quality kit, and then anchor it into soft topsoil using the provided 6-inch tent stakes. The first 40mph gust of wind will turn that structure into a massive kite, destroying your equipment and your plants. You must use earth anchors driven at least 24 inches into the ground, or bolt the base to a wooden perimeter frame.
📈 What to Expect: Real-World Performance
When transitioning outdoors, you need to understand the “efficiency gap.” While an indoor tent gives you 100% control over the environment, a greenhouse acts as an environmental buffer.
The Terpene Advantage:
One of the most profound things you’ll notice is the difference in your final product. Sunlight provides a complex spectrum of UV-A and UV-B rays that LED lights struggle to perfectly replicate. In my experience, plants grown under diffused polycarbonate exhibit dramatically higher terpene production—they smell louder and more complex—as a biological stress response to the natural sun.
The Daily Routine:
Expect to become an amateur meteorologist. Your daily routine will shift. Instead of relying on automated timers, you will manually open doors at 8 AM to vent morning humidity and close them at dusk to trap the daytime heat. It is a more labor-intensive, tactile way of growing, but the sheer size of the yields you can achieve outdoors makes the daily zipper-pulling entirely worth it.
💵 Long-Term Cost & Maintenance
Let’s look at the Total Cost of Ownership (TCO). A budget PE-covered tent like the Quictent might only cost $150 upfront. However, UV degradation is relentless. By the end of year one, the plastic will become brittle. By year two, it will tear. You will be replacing that cover every 18 to 24 months.
Contrast this with a rigid polycarbonate model. The initial outlay is three times higher, but the maintenance cycle is far less aggressive. To keep a hard-shell model performing like day one, you simply need to power-wash the algae off the exterior panels every spring (to maintain light transmission) and spray the door hinges with a dry silicone lubricant. When you factor in the replacement costs of PE covers and the potential loss of a crop to a collapsed frame, the rigid structures usually become the cheaper option by year three.
✨ Don’t Miss These Exclusive Deals!
💬 Ready to start building your backyard oasis? Click on any of the highlighted products to check current pricing and jumpstart your 2026 outdoor season! 🚀
🏁 Conclusion: Elevating Your Grow
Choosing the right greenhouse for weed is a transformative step in your cultivation journey. It bridges the gap between the chaotic mercy of Mother Nature and the sterile confinement of an indoor grow tent. Whether you opt for the fortress-like security of the Palram Canopia, the mid-range versatility of the Outsunny, or the rapid, tactical deployment of the Eagle Peak Pop Up, your success ultimately depends on how well you manage your newly created microclimate.
Remember, the structure is just the canvas. True mastery comes from dialing in your ventilation, managing your humidity spikes, and maintaining a vigilant eye on the changing seasons. Invest in a quality foundation, don’t skimp on your exhaust fans, and get ready to harvest some of the most robust, sun-kissed flowers of your life.
❓ FAQs
❓ Can I grow weed in a greenhouse during the winter?
✅ Yes, but it requires substantial upgrades. You will need a heavy-duty polycarbonate structure, a dedicated 240V space heater, and supplemental LED grow lights to compensate for the shortened winter daylight hours. Unheated PE tents will not survive freezing temperatures…
❓ Does a greenhouse mask the smell of flowering cannabis?
✅ Not on its own. A standard structure will actually concentrate the odor and blast it out through the vents. To mask the smell, you must fully seal the structure and utilize a mechanical exhaust fan paired with a large, heavy-duty activated carbon filter…
❓ What is the best material for a greenhouse for weed?
✅ 4mm twin-wall polycarbonate is the industry standard. It provides exceptional light diffusion (preventing light burn), distorts the view for privacy, and offers strong thermal insulation, making it vastly superior to single-layer glass or cheap polyethylene plastic films…
❓ How much ventilation do I actually need?
✅ The general rule of thumb is that your exhaust system should be able to replace the entire volume of air inside the structure every 1 to 3 minutes. For an 8×10 foot space, aim for an exhaust fan rated for at least 400 CFM (Cubic Feet per Minute)…
❓ Do I need a permit to build a greenhouse in my backyard?
✅ It depends entirely on your local municipality and the structure’s size. Many areas allow temporary structures (like pop-ups or soft covers) or footprints under 100 square feet without a permit, but permanent polycarbonate foundations often require zoning approval and compliance with setback rules…
📚 Recommended for You
- Best Hydroponic System for Weed: 7 Powerful Systems for Fast, Healthy Growth [2025]
- Hydroponic Greenhouse: 7 Powerful Benefits for Faster, Healthier Plant Growth
- Greenhouse Seed Starter: 7 Powerful Ways to Grow Strong, Healthy Plants Faster
Disclaimer: This article contains affiliate links. As an Amazon Associate, I earn from qualifying purchases. If you purchase products through these links, we may earn a small commission at no additional cost to you.
✨ Found this helpful? Share it with your friends! 💬🤗
[addtoany]