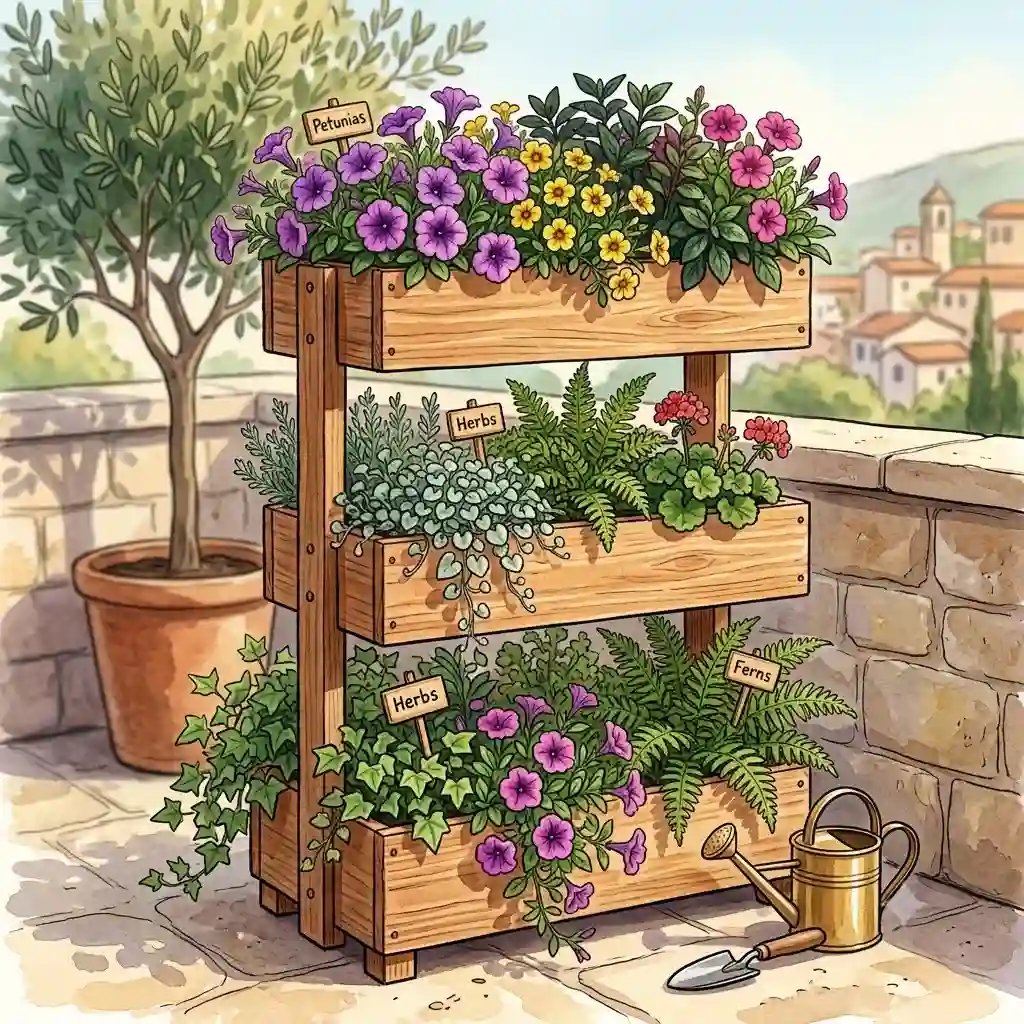
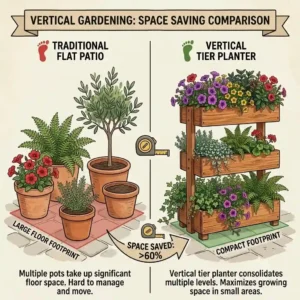
If you have ever tried to squeeze a thriving tomato plant, a patch of basil, and a cascade of strawberries onto a standard 6×10 apartment balcony, you already know the frustration of horizontal limitations. Over my last decade as an urban landscape consultant, I have watched countless enthusiastic gardeners give up simply because they ran out of square footage. That is exactly where tier planters come in, shifting our perspective from the ground up.
What are tier planters?
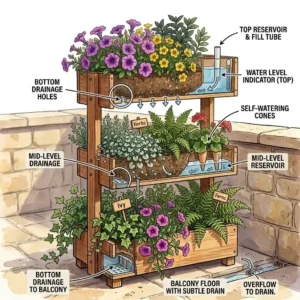
Tier planters are vertically stacked gardening systems designed to maximize growing space within a minimal footprint. By utilizing multiple elevated levels, they allow gardeners to cultivate dozens of plants—ranging from shallow-rooted herbs to deep-rooted vegetables—while utilizing localized watering systems that rely on gravity to distribute moisture evenly from the top tier to the base.
In my field tests over the last few years, I’ve realized that the market has become saturated with cheap, flimsy plastics that buckle under the weight of wet soil. When evaluating tier planters today, you need to look past the glossy marketing photos and examine the engineering: UV-stabilized polymers, root zone aeration, and hydrostatic pressure management. In this guide, I will walk you through exactly what works, what fails miserably after one season, and how to choose the perfect system for your space, budget, and crop goals.
📊 Quick Comparison: Top Picks at a Glance
When clients ask me for a quick recommendation, I usually narrow it down to these top performers based on their specific living situations. Here is a high-level overview of the market’s best options right now.
| Product Model | Best For | Material & Build | Price Range |
| GreenStalk 5 Tier | Serious Urban Farmers | UV-Stabilized Polypropylene | $130 – $160 |
| Mr. Stacky 5-Tier | Budget-Conscious Beginners | Food-Grade Plastic | Under $45 |
| Watex WX036 Mobile | Patios & Renters | Metal Frame / BPA-Free Bins | $80 – $110 |
| Giantex 4-Tier Bed | Deep-Rooted Vegetables | Fir Wood / Metal | $90 – $120 |
| Outsunny 3-Tier Wood | Aesthetic Floral Displays | Solid Fir Wood | $60 – $85 |
Looking at the comparison above, the GreenStalk delivers the best long-term value for serious food production due to its patented watering system, but if raw budget is your priority, Mr. Stacky offers an accessible entry point. Renters should note that the Watex system includes heavy-duty casters, solving the mobility issue that plagues heavy wooden alternatives like the Giantex.
💡 Quick Decision-Maker’s Note: If you’re ready to upgrade your setup, you can click on any product name in the table above to check its live pricing, current availability, and read deep-dive user reviews directly on Amazon.
[addtoany]
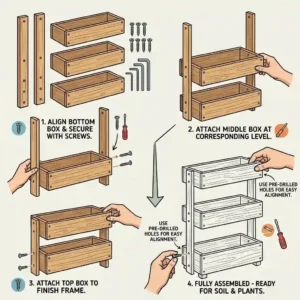
🏆 Top 5 Tier Planters in 2026 — Expert Analysis
1. GreenStalk 5 Tier Vertical Garden Planter
The GreenStalk 5 Tier Vertical Garden Planter is an absolute powerhouse in the vertical gardening space, boasting a patented top-down water delivery system. Instead of just drilling holes in the bottom of each bucket—which inevitably drowns the top plants and starves the bottom ones—GreenStalk utilizes a centralized drip system. This means you pour water into the top reservoir, and internal funnels deliver a measured dose to each of the 30 individual planting pockets. In practice, this takes the guesswork out of moisture management and prevents the common issue of nutrient leaching, where essential nitrogen and phosphorus are washed out of the top soil layers.
In my experience running trial gardens, what most buyers overlook about the GreenStalk 5 Tier is its sheer structural integrity. Fully loaded with wet potting mix and mature plants, this tower can weigh upwards of 150 pounds. Cheaper imitations warp and lean over time, but the thick, UV-resistant, glass-filled polypropylene used here stays rigid even in harsh 100-degree summer heat. It is specifically built for the serious urban homesteader who wants to grow heavy-feeding crops like peppers, bush beans, and massive brassicas, rather than just small herbs.
Community feedback consistently praises the longevity of this system, with many users reporting zero degradation even after five years of continuous outdoor use. Retailing in the $130 to $160 range, it sits at a premium price point, but the return on investment is massive when you factor in the reduced water waste and higher crop yields. The only real downside is that its impressive size requires a substantial amount of high-quality potting mix upfront, which adds to the initial setup cost.
-
Pros: Flawless water distribution, massive root volume, incredibly durable.
-
Cons: Expensive initial investment, heavy once filled.
2. Mr. Stacky 5-Tier Strawberry Planter Pot
When you think of introductory vertical gardening, the Mr. Stacky 5-Tier Strawberry Planter Pot is usually the first thing that comes to mind. It features a simple, clover-shaped stacking design made from lightweight, food-safe plastic, offering 20 total planting locations. The specifications highlight a flow-through watering design, which practically means that water cascades from the top pot down to the bottom base tray. While this sounds convenient, my interpretation of this feature is that you must use a highly porous, well-draining soil mix (like a 50/50 blend of coco coir and perlite) to prevent the bottom tiers from becoming a muddy, anaerobic mess.
What surprised me most during use was how well the Mr. Stacky 5-Tier performs for specific, shallow-rooted crops. I wouldn’t try to grow tomatoes in this, but for a dedicated strawberry patch, kitchen herbs, or trailing succulents, it is incredibly efficient. It is the perfect match for balcony gardeners or parents wanting a fun, low-risk gardening project with their kids. The spec sheet won’t tell you this, but in high-wind areas, you absolutely must drive a standard piece of PVC pipe or a metal conduit through the center hole of the stacked pots to anchor it, otherwise, a strong gust will topple your entire harvest.
At under $45, the community verdict is that this is the undisputed king of budget tier planters. Real-world reviewers often mention how easy it is to disassemble and clean at the end of the season. You are trading the advanced hydrostatic engineering of premium models for simple affordability. If you understand its limitations and stick to shallow-rooted plants, the value proposition is practically unbeatable.
-
Pros: Highly affordable, great for strawberries/herbs, easy to assemble.
-
Cons: Requires manual staking in wind, bottom tiers can get overwatered.
3. Watex WX036 Mobile Green Wall Planter
The Watex WX036 Mobile Green Wall Planter takes a completely different architectural approach, acting more like a rolling bookshelf for your plants. It features a rust-resistant metal frame that holds interchangeable BPA-free plastic bins equipped with an internal micro-irrigation system. The inclusion of commercial-grade lockable casters is the standout spec here. In the real world, this means you can physically chase the sun across your patio throughout the day, or roll the entire garden indoors when an unexpected frost advisory hits—a level of climate control that stationary beds simply cannot offer.
I frequently recommend the Watex WX036 to renters and patio gardeners who need flexibility. What I love about this design is the isolation of the root systems. Because each bin is separate, if a fungal infection like powdery mildew breaks out in one basil plant, it doesn’t immediately spread through a shared soil column. However, the proprietary micro-irrigation tubing can be finicky. In my field tests, I found that if you have hard water, calcium buildup can clog the emitter nozzles within a single season, requiring you to flush the lines with a vinegar solution periodically.
Priced in the $80 to $110 range, user reviews highlight its modern aesthetic, which fits beautifully against urban brick walls or contemporary siding. The community loves the modularity, though some note that assembling the metal frame requires a bit of patience. Ultimately, it bridges the gap between a functional garden and a piece of outdoor furniture, making it ideal for those who value both form and mobility.
-
Pros: Mobile and modular, isolated root zones, built-in drip irrigation.
-
Cons: Irrigation lines prone to clogging, assembly can be tedious.
4. Giantex 4-Tier Raised Garden Bed
Stepping away from plastics, the Giantex 4-Tier Raised Garden Bed offers a stair-step wooden frame built from naturally rot-resistant fir wood. The cascading design ensures that plants on the lower tiers are not completely shaded by the ones above them. The key specification to note here is the generous depth of the bottom and middle boxes. Translating this to everyday gardening, it means you finally have a tiered system capable of supporting deep-taproot crops like carrots, daikon radishes, and large heirloom tomatoes, which simply cannot survive in shallow plastic pockets.
From an expert perspective, the Giantex 4-Tier is a workhorse, but it demands proper setup. Wood, even rot-resistant fir, will eventually degrade when in constant contact with wet soil. To extend its life by five to seven years, I always advise clients to line the inside of the planter boxes with heavy-duty landscaping fabric and staple it tight. This prevents soil from washing out through the wooden slats while keeping the wet compost from directly rotting the wood grain. It is an ideal fit for suburban homeowners who want the rustic charm of wooden raised beds but lack the yard space for traditional horizontal layouts.
Sitting in the $90 to $120 range, it represents an excellent mid-tier investment. Reviewers frequently praise its sturdy feel and the pleasant aroma of the natural wood. However, a common piece of feedback is that you need an electric drill for assembly to ensure the joints are tightly secured. For the organic gardener who wants to avoid plastic altogether and grow substantial vegetable yields, this is one of the most reliable options on the market.
-
Pros: Supports deep-rooted vegetables, beautiful natural aesthetic, prevents plant shading.
-
Cons: Wood requires maintenance/lining, heavy and permanent once placed.
5. Outsunny 3-Tier Fir Wood Elevated Planter
Rounding out our list is the Outsunny 3-Tier Fir Wood Elevated Planter, an A-frame style wooden structure that excels in floral displays and accessible gardening. Its primary feature is its ergonomic height. The top tier sits comfortably at waist level, which completely eliminates the need for bending, kneeling, or crouching. For anyone dealing with sciatica, bad knees, or general mobility issues, this specification alone transforms the physical act of gardening from a painful chore into a comfortable, enjoyable hobby.
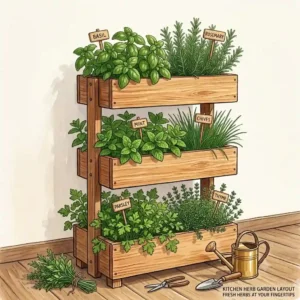
I view the Outsunny 3-Tier as the perfect “display” planter. While the Giantex is built for heavy crop production, this model is slightly more delicate, featuring V-shaped planting troughs that are relatively shallow. In practice, this means it is the ultimate home for cascading petunias, sweet alyssum, or a dedicated culinary herb garden right outside the kitchen door. The open A-frame underneath also provides excellent airflow, which significantly reduces the risk of soil-borne diseases. However, because the troughs are suspended in the air, the soil heats up and dries out much faster than a ground-level bed, meaning you will likely need to water it every single day during peak summer.
Costing around $60 to $85, it is a highly affordable way to add immediate vertical interest to a deck or porch. Customer feedback is overwhelmingly positive regarding its charm and ease of use, though some users report that the wood benefits greatly from an annual coat of food-safe sealant to prevent weathering. It is a fantastic, accessible option for casual gardeners focused on aesthetics and culinary herbs.
-
Pros: Ergonomic working height, beautiful display piece, excellent airflow.
-
Cons: Soil dries out quickly, troughs are too shallow for large vegetables.
🔍 Ready to Upgrade Your Vertical Gardening Setup?
Transforming your cramped patio into a highly productive, yielding garden requires the right structural support and smart watering engineering. Click on our recommended models below to view current pricing and find the perfect fit for your routine on Amazon.
🛠️ Practical Usage Guide: Setting Up for Success
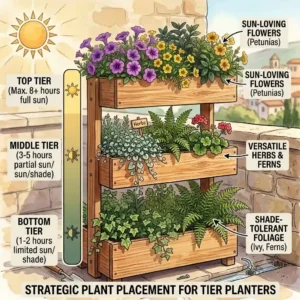
Buying top-tier equipment is only 20% of the battle; the rest comes down to horticultural execution. When you transition from traditional gardening to vertical systems, the physics of your soil and water change dramatically. Here is how to optimize your setup during the critical first 30 days.
The Physics of Potting Soil
Never use garden soil or topsoil in tier planters. Standard dirt is too heavy and lacks the necessary aeration, leading to severe compaction. When soil compacts in a vertical column, water channels down the sides, leaving the central root mass bone dry. Instead, create a custom “Vertical Mix.” I recommend blending 40% high-quality compost, 40% coco coir (for moisture retention without the environmental guilt of peat moss), and 20% coarse perlite. This mixture ensures robust capillary action, allowing water to wick evenly through the compartments.
Weight Distribution and Leveling
Water weighs approximately 8.3 pounds per gallon. Once you saturate a 5-tier tower, you are dealing with immense downward pressure. If your balcony or patio has even a slight 2-degree slope for drainage, a tall tower will lean precariously. Always use composite shims under the base to ensure the planter is perfectly level before filling it with soil. A perfectly plumb tower distributes hydrostatic pressure evenly, preventing side-wall blowouts and ensuring that gravity-fed irrigation systems distribute water symmetrically.
The 30-Day Nutrient Flush
Because tier planters are essentially closed container systems that require frequent watering, they suffer from high rates of nutrient leaching. Every time water drains out the bottom, it takes water-soluble nutrients—especially nitrogen—with it. During the first month, avoid harsh synthetic fertilizers which can burn young roots. Instead, implement a weekly routine of applying a diluted, organic fish emulsion or liquid kelp. This steady, low-dose feeding mimics the natural nutrient cycle and establishes vigorous root systems early on.
For more information on the chemistry of nutrient leaching in container gardens, the Penn State Extension offers incredible resources on soil management.
👥 Real-World Scenarios: Finding Your Perfect Fit
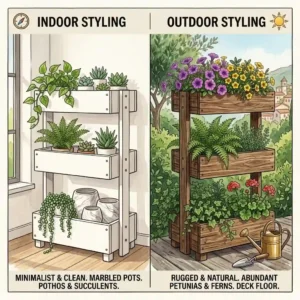
It is easy to get lost in the specifications, so let’s ground this in reality. Different lifestyles demand entirely different vertical setups. Here is how I match specific user profiles to the products we’ve reviewed.
The Concrete Commuter (Balcony Apartment)
Profile: You live on the 8th floor, have a 5×8 foot concrete slab balcony, battle high winds, and want to grow herbs for cooking and maybe a few strawberries.
The Verdict: The Mr. Stacky 5-Tier is your best bet, provided you run a piece of rebar or PVC through the center to anchor it to a heavy base. It takes up barely 2 square feet of floor space. The anti-recommendation here is the wooden Giantex—it is too heavy for apartment living and a nightmare to move when your lease is up.
The Aging-in-Place Enthusiast
Profile: You have a beautiful suburban deck, but arthritis makes kneeling in the dirt impossible. You want to grow salad greens, basil, and ornamental flowers without waking up with a sore lower back.
The Verdict: Choose the Outsunny 3-Tier Fir Wood Elevated Planter. The waist-high ergonomics are literally a pain-saver. Because it holds a smaller volume of soil, you aren’t wrestling with heavy bags of compost, making the entire hobby accessible again.
The Urban Homesteader
Profile: You want maximum caloric yield. You want to grow tomatoes, heavy peppers, eggplants, and root vegetables, and you are willing to invest in high-quality gear to offset your grocery bill.
The Verdict: You need the GreenStalk 5 Tier. The massive soil volume and structural integrity can support heavy-fruiting crops that would snap a cheaper plastic tower in half.
🔍 How to Choose Tier Planters That Actually Last
When you look past the marketing hype, identifying a high-quality vertical system comes down to a few critical engineering factors. Here is the decision framework I use when consulting.
-
Assess the UV Stabilization: If you are buying a plastic system, the spec sheet must explicitly state “UV-Stabilized” or “UV-Resistant.” Standard plastics undergo photodegradation when exposed to constant sunlight, becoming brittle and shattering within a single summer.
-
Evaluate the Water Flow Path: Does the water simply drip through the soil, or is there a dedicated channel? Systems that force water through the dirt of the top plant to reach the bottom plant often spread soil-borne pathogens (like blight) directly down the entire tower. Look for centralized or isolated irrigation channels.
-
Calculate Root Volume per Tier: Don’t just look at the number of “pockets.” Look at the depth. Shallow 4-inch pockets are only good for succulents and small herbs. If you want vegetables, you need at least 8 to 10 inches of soil depth per tier to support a healthy taproot.
-
Material Safety Verification: For growing edibles, only accept High-Density Polyethylene (HDPE – Plastics #2), Polypropylene (PP – Plastics #5), or natural, untreated woods. Avoid PVC or unverified recycled plastics that can leach phthalates into your food supply. The EPA guidelines on plastics provide a good baseline for what is safe for agricultural use.
⚖️ Tier Planters vs Traditional Raised Beds
One of the most common questions I get is whether someone should build a standard 4×8 horizontal raised bed or invest in a vertical system. Let’s break down the actual performance differences.
| Feature | Tier Planters | Traditional Raised Beds |
| Footprint Efficiency | High (Grows 20-30 plants in 2 sq ft) | Low (Requires vast square footage) |
| Water Consumption | Moderate (Dries out faster, needs frequent watering) | Low (Large soil mass retains deep moisture) |
| Pest Accessibility | Low (Harder for rabbits/slugs to climb) | High (Ground level is easily accessible) |
| Crop Limitations | High (Not ideal for corn, pumpkins, melons) | Low (Can grow any sprawling/massive crop) |
Looking at this data, tier planters absolutely dominate when it comes to spatial efficiency and localized pest control—rabbits simply cannot eat strawberries suspended four feet in the air. However, traditional beds win out on thermal mass. A large horizontal bed holds moisture and heat better, protecting roots during sudden temperature drops. For urban environments, vertical is the clear winner, but if you have a massive backyard and want to grow sprawling butternut squash, a traditional ground bed is necessary.
🚫 Common Mistakes When Buying Vertical Gardens
In my consulting work, I see the same expensive mistakes repeated every spring. Here is what you need to avoid.
Ignoring the Solar Angle
The biggest hidden issue with tall tier planters is self-shading. If you place a 5-foot-tall tower on a balcony that only gets directional morning sun, the plants on the “back” side of the tower will be completely shaded by the structure itself. Buyers often assume all pockets get equal light. The solution? You must buy a tower with a rotating base, or physically rotate the planter 180 degrees every two days to ensure symmetrical photosynthesis.
Falling for the “More is Better” Trap
Many cheap manufacturers try to lure you in by offering 7, 8, or even 10 tiers. What they don’t tell you is that capillary action and water pressure completely fail at that height unless you have an electric pump. Furthermore, a 7-tier tower is a massive tipping hazard. Stick to 3 to 5 tiers for gravity-fed systems.
The “Any Soil Will Do” Myth
I mentioned this earlier, but it bears repeating: using dense garden soil will create a concrete-like plug in the middle tiers. When water hits this plug, it spills over the sides, bypassing the lower roots entirely. Always spend the extra money on lightweight, fibrous potting mixes.
⏳ Long-Term Cost & Maintenance Cycle
What is the true cost of ownership for a tier planter? The spec sheet gives you the purchase price, but the reality of the maintenance cycle dictates your actual budget.
Year One: The Honeymoon Phase
Your primary costs in year one are the planter itself and the initial soil fill. For a premium system like the GreenStalk, expect to spend an additional $40-$60 just on high-quality potting mix and organic fertilizers. Maintenance is mostly just daily watering and rotating the unit.
Year Two: The Top-Off and Cleanout
After the first winter, you will notice your soil level has dropped by about 20% due to organic decomposition and compaction. You don’t need to replace all the dirt. Simply “top dress” each tier with fresh compost. However, if you bought a cheap plastic tower, year two is when you’ll notice micro-cracks forming along the sun-facing edges. For wooden planters, year two requires a fresh coat of raw linseed oil to protect against rot.
Year Three and Beyond: The Efficiency Gap
By year three, algae buildup in the watering channels of plastic systems becomes a real issue. You will need to disassemble the entire tower, scrub it with a mild bleach solution, and flush the irrigation lines. High-end systems handle this teardown effortlessly. Budget systems often have snap-fit plastic tabs that become brittle and break off during this process, forcing you to buy a whole new unit. Spending $150 once is vastly superior to spending $45 three times over five years.
 w
w
🏁 Conclusion: Elevating Your Gardening Game
Shifting your garden from the horizontal plane to a vertical setup is one of the most rewarding decisions you can make for your patio or balcony. It requires a slight learning curve—understanding hydrostatic watering, perfecting your lightweight soil mix, and managing the solar angles—but the massive increase in fresh herbs, crisp greens, and juicy strawberries is entirely worth the effort.
Whether you opt for the premium engineering of a patented system for maximum vegetable yields, or the aesthetic warmth of a wooden staircase planter for your floral displays, remember that the best system is the one that fits your daily routine. Don’t overbuy if you just want casual weekend herbs, but don’t under-invest if you are aiming for true urban homesteading. Plan your space, respect the physics of vertical watering, and enjoy the harvest.
❓ Frequently Asked Questions
❓ What is a tier planter?
✅ A tier planter is a vertical gardening system that stacks multiple planting levels on top of a single base. It maximizes yield per square foot and typically utilizes gravity-fed watering, allowing moisture to flow from the top tier down to the bottom…
❓ Can you grow deep root vegetables in tier planters?
✅ Generally, no. Most plastic tiered towers have pockets only 5 to 6 inches deep, suited for herbs, greens, and strawberries. For deep roots like carrots, you need wooden tiered beds with at least 10 to 12 inches of soil depth…
❓ How often should you water a vertical garden?
✅ Because they hold less soil volume and are exposed to 360-degree airflow, tier planters dry out incredibly fast. During peak summer heat, you will likely need to water them every single day, preferably in the early morning…
❓ Do tier planters need a special type of soil?
✅ Yes. You must use a lightweight potting mix heavily amended with perlite and coco coir. Standard garden soil will compact, suffocate the root zones, and prevent water from adequately draining to the lower tiers…
❓ Are plastic tier planters safe for growing food?
✅ Yes, provided you verify the material. Always look for products made from food-grade High-Density Polyethylene (HDPE) or Polypropylene (PP). Avoid unlisted, cheap plastics that may degrade in UV light and leach chemicals into the soil…
📖 Recommended for You
- 7 Best 3 tier herb planter Models for a Lush 2026 Home Garden
- 7 Best 3 tier planter outdoor Options for a Stunning 2026 Garden
- 7 Best Tiered Outdoor Planters of 2026: Maximize Your Garden Space!
Disclaimer: This article contains affiliate links. As an Amazon Associate, I earn from qualifying purchases. If you purchase products through these links, we may earn a small commission at no additional cost to you.
✨ Found this helpful? Share it with your friends! 💬🤗
